This past weekend was Thanksgiving here in Canada and I just have so much to be thankful for.
Things have been a little different this year with the chaos of Covid and all the rules and restrictions put in place but I found a few unexpected things that I was incredibly grateful for.
One thing that genuinely surprised me was the fact that my children were able to be in school.
I always took this for granted as it has always been something available to us but when my children couldn’t attend because of the shut down, I very quickly realized how lucky my children were.
What are you grateful for?
My kids having a place to go to learn, socialize with other children and where they are supported in the growth of their individuality is incredibly important to me and many other families.
It lets children learn to be independent from their parents and take healthy risk in a safe environment that will benefit them in the long run.
My kids did adjust well to being home and learning online but they really missed their friends and school.
The missed playing the floor is lava on the playground, chatting at lunch time and playing tag in the field.
They had routine at home but they missed their school routines.
The decision to send them back to school was a hard one but when my youngest son came running out of the school screaming this was the best day ever, I knew that I made the best choice for our family.
They have stories to tell me every day and always have smiles on their face. My oldest may not like the homework aspect of school but he sure loves being there.
I will be more thankful from now on!
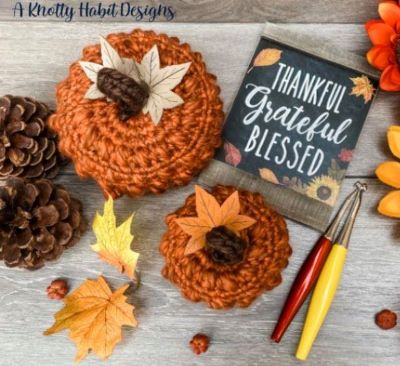
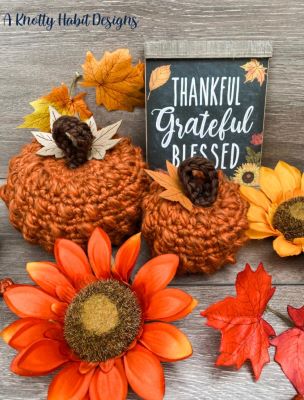
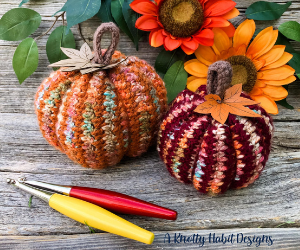
Being grateful is what led me to design the Thankful Gourd.
Every time I see it on my fireplace, it reminds me to be thankful for all the things that I use to take for granted.
PATTERN - Thankful Gourd
What you need:
8 mm crochet hook
Any Bulky weight (6) yarn. I used Cozy Wool
Scissors
Tapestry Needle
Fiber Fill
Notes: written in US terminology. All CH1 do not count as a stitch. You can use any 6-weight yarn.
Gauge with 8 mm hook: Gauge isn’t important. Just keep your stitches tight.
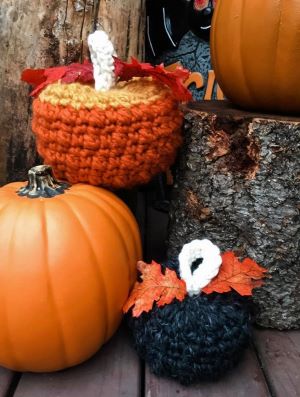
Sizes: two sizes
Stitches you will be working with:
CH: Chain
PS: Puff Stitch (Yarn over (YO), insert hook in next space. Pull yarn back through the space, creating 3 loops on your hook. YO, insert hook in same space. Pull yarn back through the space, creating 5 loops on your hook. YO, pull through all 5 loops.
SC: Single Crochet SLST: Slip Stitch ST: Stitches
Large Pumpkin Pattern: 8.00 mm hook
Magic Circle (MC)
Row 1 : 6 SC in MC, SLST to join. (6 STS)
Row 2 : CH 1, 2 SC in each ST around, SLST to join. (12 STS)
Row 3 : CH 1, 2 SC in each ST around, SLST to join. (24 STS)
Row 4 : CH 1, [2 SC in next ST, SC in next ST] 12 times, SLST to join. (36 STS)
Row 5 : CH 1, [SC in next ST, PS in next ST] 18 times, SLST to join. (36 STS)
Row 6 : CH 1, SC around, SLST to join. (36 STS)
Repeat row 5 and 6 for rows 7 to 15.
Row 16 : CH 1, [SC2TOG, SC in next ST] 12 times, SLST to join. (24 STS)
Stem : 8.00 mm hook CH 13 Row 1 : SC in the second CH from the hook and in the next 11 STS. (12 STS) Fasten off and leave a long tail to sew your stem to your pumpkin
Finishing Your Pumpkin
Taking your tapestry needle and yarn tail, push your needle through the bottom middle of your pumpkin and come through the top middle of your pumpkin. Pull it tight to create an indent in the bottom of your pumpkin and secure it with a stitch or two.
Push your needle through the top middle of your pumpkin and come through the bottom middle of your pumpkin. Pull it tight to create an indent at the top of your pumpkin and secure it with a stitch or two.
Now sew on your stem with your tapestry needle and stem yarn tail. Weave in all ends.
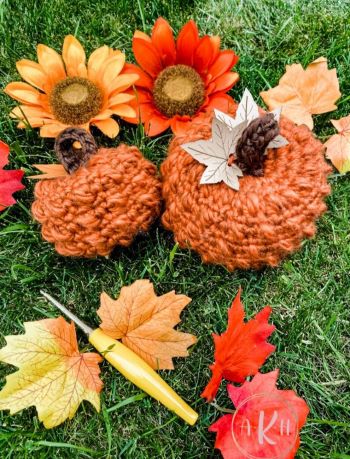
There you have it!
You have made your very own Thankful Gourd.
If you want a printed version of this pattern, click on over to my Ravelry site here where you can buy and download instantly.
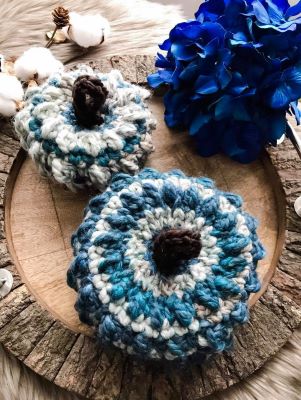
I love to see your finished items, so feel free to use #thankfulgourd when you are posting your photos, so I can admire your work!
The photographs and pattern contained in the document are the property of A Knotty Habit Designs. You may not reproduce, redistribute, or share this pattern. You may sell your finished items but please give credit to A Knotty Habit Designs.
This website uses cookies to improve your experience. We'll assume you're ok with this, but you can opt-out if you wish. Cookie settingsACCEPT
Privacy & Cookies Policy
Privacy Overview
This website uses cookies to improve your experience while you navigate through the website. Out of these cookies, the cookies that are categorized as necessary are stored on your browser as they are essential for the working of basic functionalities of the website. We also use third-party cookies that help us analyze and understand how you use this website. These cookies will be stored in your browser only with your consent. You also have the option to opt-out of these cookies. But opting out of some of these cookies may have an effect on your browsing experience.
Necessary cookies are absolutely essential for the website to function properly. This category only includes cookies that ensures basic functionalities and security features of the website. These cookies do not store any personal information.
Any cookies that may not be particularly necessary for the website to function and is used specifically to collect user personal data via analytics, ads, other embedded contents are termed as non-necessary cookies. It is mandatory to procure user consent prior to running these cookies on your website.